
Alright here we go. These pumpkins are SUPER easy (and yes Janet 2 year old proof)! If you can sew a straight line.... you can make these. All of my measurements are subject to change. Play around with different widths and sizes. From my experience the cutest ones are the super fat and short ones or the thin and tall ones, however make them according to how you'd like. I picked out my fabric in warm fall colors from the clearance pile at Wal-Mart. I got about 1/3 of a yard of each and I had PLENTY left over. I chose 5 different colors and one stem color, however you can mix and match if you'd like... let your imagination have fun! For visibility I used black thread on white fabric. It doesn't make a difference but you can match your thread if you'd like.
 1. Place your STEM fabric RIGHT sides together and cut a size you'd like your stem to be. I made mine 5 x 3 which was much too tall! In the end I chopped them down 3". I found them cuter and they didn't fall over once sewn in. Cut 6 (or however many pumpkins you plan to make)
 2. Sew around the edge. Seam allowance is irrelevant. The closer to the edge the better so you won't have to trim it down later. LEAVE THE BOTTOM OPEN. You'll be stuffing it soon!
 3. Clip the corners. This makes the corners crisper on the other side. DO NOT TRIM THE STITCHING! If your seam allowance is to wide... Trim it down as well.
 4. Stuff and set aside leaving bottoms open.
 5. Like I said before, make your pumpkins whatever size and width you'd like. I went with 12 x10 for my largest one. Cut out 6 pumpkins. Separate the 2 layers and fold them in half right sides together.
 6. You are now going to mark a swoop on both pieces along the folded edge. This will give shape to the pumpkin. I marked mine 2" in and 4" down. Obviously this is subject to change based on height and width of pumpkin.
 7. Go to your machine and sew a curve in between the two points & trim. DO NOT MAKE YOUR CURVE AS DRAMATIC AS MINE! Mine is bad. It made an ugly point when I flipped it right side out & I had to hand stitch it later. Try to make the bottom point BLEND. Does that make sense?
 8. Open fabric and set down on the table RIGHT side UP. Place the stem in the middle Open end to the TOP. Then Place side 2 of fabric RIGHT side DOWN.
 The stem should be sandwiched in between and the fabric should be RIGHT sides TOGETHER.
  9. Sew around the edge and leave an opening at the bottom.
 10. Trim the edges and flip right side out. Stuff. Before you hand sew the bottom you can add a little weight so it will sit nicely.
 11. Ta-Da! See EASY! I think I need to make one more super fat one to complete the set. To finish them off I added some ribbon. This also helped make my stems not look so long. If you have any questions please feel free to leave a comment and I will try to explain it further. Happy Fall!!
 1. Place your STEM fabric RIGHT sides together and cut a size you'd like your stem to be. I made mine 5 x 3 which was much too tall! In the end I chopped them down 3". I found them cuter and they didn't fall over once sewn in. Cut 6 (or however many pumpkins you plan to make)
 2. Sew around the edge. Seam allowance is irrelevant. The closer to the edge the better so you won't have to trim it down later. LEAVE THE BOTTOM OPEN. You'll be stuffing it soon!
 3. Clip the corners. This makes the corners crisper on the other side. DO NOT TRIM THE STITCHING! If your seam allowance is to wide... Trim it down as well.
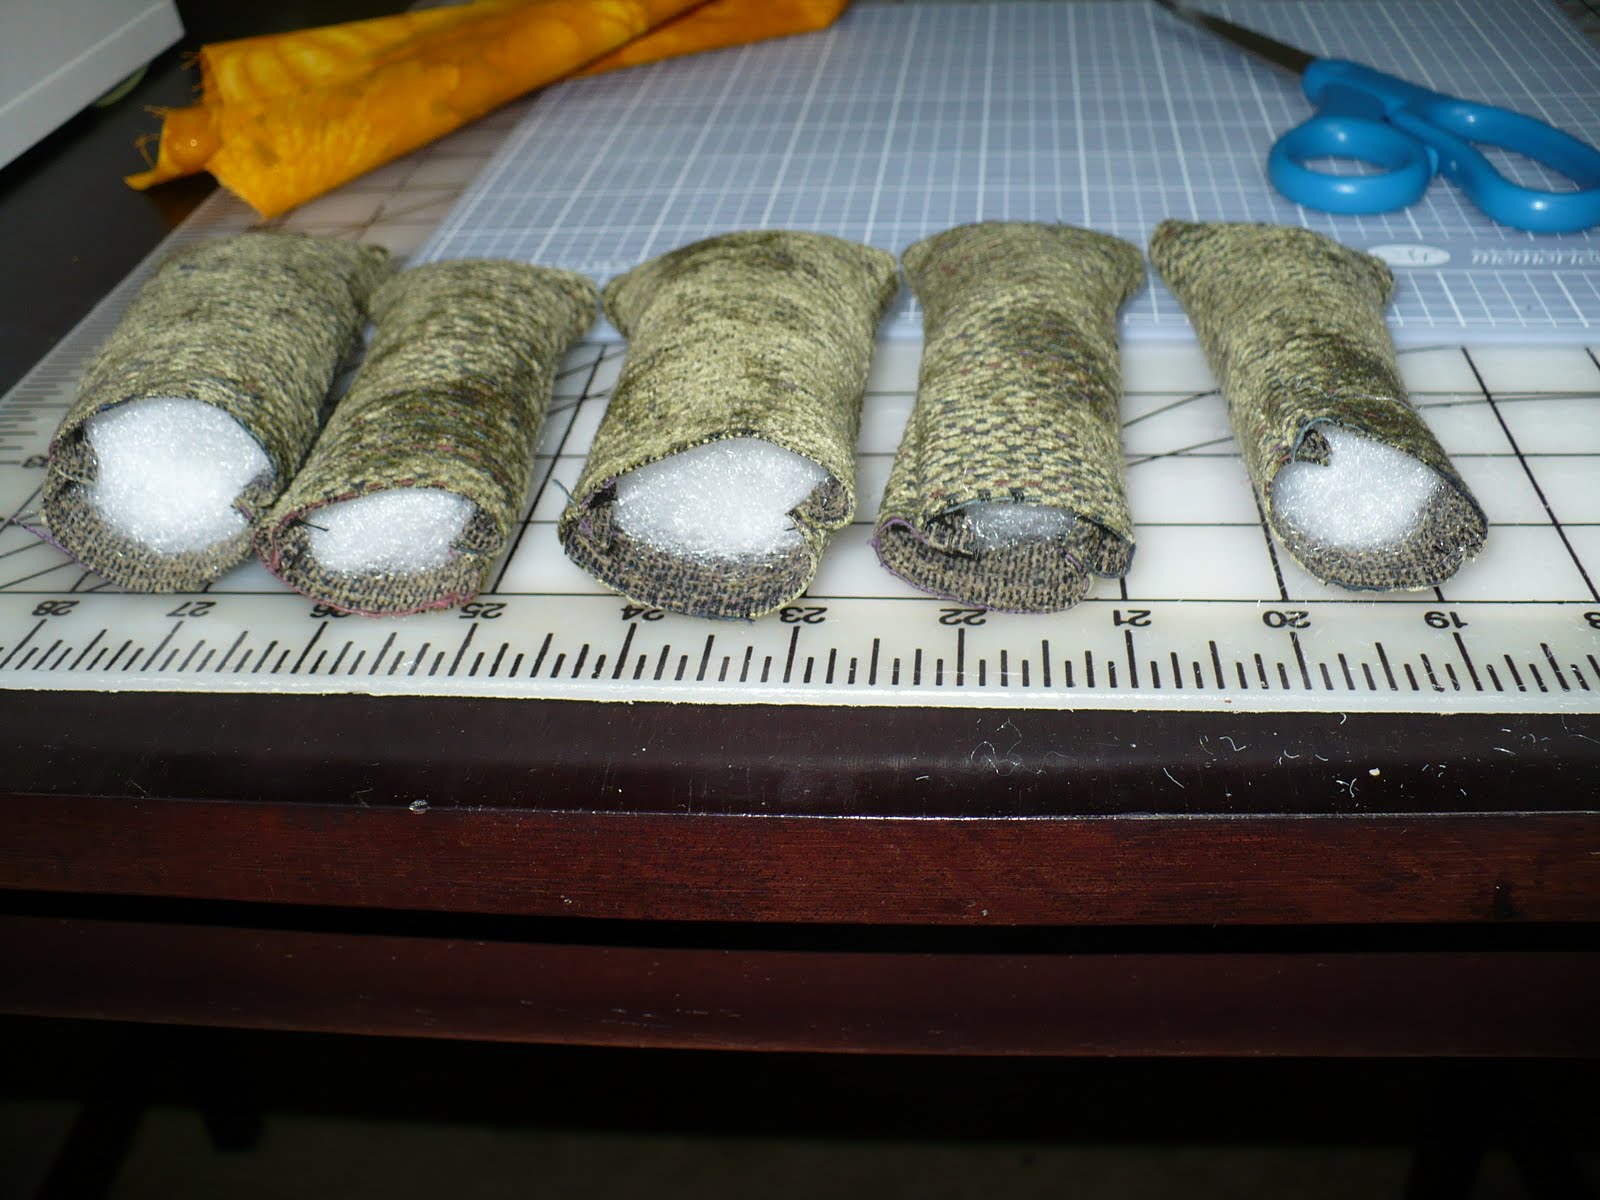 4. Stuff and set aside leaving bottoms open.
 5. Like I said before, make your pumpkins whatever size and width you'd like. I went with 12 x10 for my largest one. Cut out 6 pumpkins. Separate the 2 layers and fold them in half right sides together.
 6. You are now going to mark a swoop on both pieces along the folded edge. This will give shape to the pumpkin. I marked mine 2" in and 4" down. Obviously this is subject to change based on height and width of pumpkin.
 7. Go to your machine and sew a curve in between the two points & trim. DO NOT MAKE YOUR CURVE AS DRAMATIC AS MINE! Mine is bad. It made an ugly point when I flipped it right side out & I had to hand stitch it later. Try to make the bottom point BLEND. Does that make sense?
 8. Open fabric and set down on the table RIGHT side UP. Place the stem in the middle Open end to the TOP. Then Place side 2 of fabric RIGHT side DOWN.
 The stem should be sandwiched in between and the fabric should be RIGHT sides TOGETHER.
  9. Sew around the edge and leave an opening at the bottom.
 10. Trim the edges and flip right side out. Stuff. Before you hand sew the bottom you can add a little weight so it will sit nicely.
 11. Ta-Da! See EASY! I think I need to make one more super fat one to complete the set. To finish them off I added some ribbon. This also helped make my stems not look so long. If you have any questions please feel free to leave a comment and I will try to explain it further. Happy Fall!!
No comments:
Post a Comment