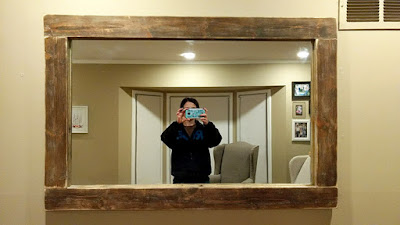
While I was in Houston I was talking with my SIL and I was trying to decide what to put in my living room over my couch. The room is already pretty busy with a boot cubby, built in book shelves and a photo collage wall, so I wanted something big but simple. She suggested a mirror and I was sold. I started looking online to find something I liked and everything ranged from $100 - $300. Seriously?! I knew I could do it for cheaper.
This was one of those projects that was super simple... but everything went wrong. I found the mirror online for $20. It was a bit more than I wanted to spend but it was a good size at 30"x 40". I then went to Home Depot to figure out exactly how I wanted to frame it. I was pretty decided on trim until I realized that it would be about $50 to get enough trim to frame the mirror and by that time I may as well have bought the mirror at IKEA for $100. So I bought two 1x4's for $5, grabbed some mirror hooks and came home. I wanted it to look farm house-ish so I opted for straight edges instead of framing the corners at 45 degree angles.
I originally had my heart set on distressing the wood so I started with a layer of stain.
Then I lightly painted on a layer of white very unevenly.
Once that was dry, I went to town with the sander.
Using the Kreg Drill I drilled some pocket holes and this is where things started going crazy. I tested out a 2 1/2" screw in a test board and it went in beautifully. Went to screw my frame together, first screw poked right through the front! Thankfully it wasn't too bad and I could fix it with a clamp and some wood glue. I then used 1 1/4" screws to attach the frame together which worked wonderfully!
I placed the mirror face down onto the frame and ran into my second problem. The screws were too long and would poke out the front. I could have used a hack saw to shorten them but instead we just bought shorter screws.

I then realized that my mirror was TOO THICK for my mirror hooks. SERIOUSLY?! I just couldn't catch a break. So back to Home Depot Jakob went this time so I didn't look like a baboon.

I drilled pilot holes into the frame and screwed the new mirror hooks with the short screws to the frame attaching the mirror.
That evening Jakob and I went to hang up the finished product. We realized that this mirror was ridiculously heavy and unless we found a stud (or 6) to hang it into it would fall. Plus if anyone one have bumped it we may also run the risk of it falling down. SO we took the mirror off the frame and attached it directly to the wall. Then we hung the frame over the mirror. It was time consuming but it is much sturdier!
I took a step back to admire my work.... and I hated it. It just looked home made and that bothered me like no other. The white looked more grey and it just wasn't what I was looking for. So I took the frame off the wall, since the mirror and the frame were conveniently separate. I sanded off all of the white paint. Added a bit more stain. Sanded it again and......
So much better!!
I love the distressed look. Dark Walnut is my favorite stain ever!
It really finishes off the space and while it isn't perfect... I love it. Thank you so much for the suggestion Janet! I'm glad to have this project checked off of my list!


No comments:
Post a Comment